It’s a sad (ish) day

I just mailed the paperwork needed to officially dissolve my company. Sad, yes? But the positive thing to focus on is that this is not the end! This was simply the too-hasty first attempt. I will continue to work towards my goals, and tackle this mess again – perhaps in a few years when I’ve built my savings back up!

So for now … I’m off to hunt for that most elusive thing: a job. Can I time these life decisions right, or what?

Categories: Uncategorized | Leave a comment

New cards up on Etsy!

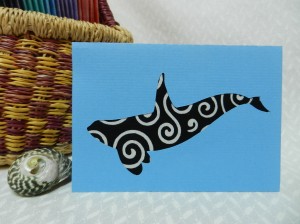
Just a few for today – but I’ll be putting up more in the next few days, since I finally got around to doing a massive photo shoot. Check ’em out.

I think this one is my favorite. Who doesn’t like spirals?
orca card

Categories: greeting cards, update | Leave a comment

Well. That didn’t go as planned.

Last week I got all ambitious and decided to have a go at making paper from blackberry vines. This has been the big cool idea lurking in the background ever since I decided to go down the small business road, and I have to say, I was pretty excited.

I already had the two pounds of dead, desiccated vines – I gathered them in January, when nothing else had leaves, and I could see what I was doing. I also had a huge pot to cook them in, thanks to Mom and her passion for canning.

Just to clarify – the cooking is supposed to soften up the fiber, and help get rid of all the sugars and proteins and things that could make the finished paper sticky, or stinky, or yellow, or generally gross. Adding soda ash to the mix speeds this up.

Or it’s supposed to …

After nine (nine!) hours on the stove, the stubborn blackberry vines had not softened, or gotten floppy, or fallen apart. All they did was turn black.

Oops.

I’ll be trying this again soon, with green vines, hoping that they won’t be quite so difficult to work with. But I gotta say – I was pretty discouraged.

Categories: business, papermaking | Leave a comment

Power tool love

It’s true. I have a new best friend.

power drill

Table building will be a lot more fun (as if it wasn’t already!) from now on.

Categories: DIY | Leave a comment

Table, take 3

Originally published May 1, 2012

This is the third table I’ve built, and it will be the most complex, and the simplest, at the same time. It is designed to be “collapsible” so that I can set it up and take it down every day when Dad drives off to work and leaves me space to play in the garage. And by collapsible I mean it will sit on sawhorses. See? Simple.

The tabletop itself, though, is a whole other animal. This is the table that I will be pulling sheets on, and that is a very wet process. I did one batch of pulp last week as a dry-run-prove-my-setup-works sort of thing (and it does – almost), and the poor scrap of plywood I used as the tabletop will never be the same. It’s warped now, and has a furry layer of dried paper pulp drips on one side.

So the new tabletop has to be as close to totally waterproof as I can get it. I really wanted to avoid The Varnish Of Doom that I used on my first mould/deckle set, since it takes forever to cure and smells like death. That’s when my genius mother suggested linoleum. Brainwave! What a fantastic idea.

A waterproof tabletop does me no good at all if the water can just run off the sides, though. It also needs some sort of lip around the edge.

See how this is getting complicated? Just wait, there’s more!

Aside from being waterproof, I wanted this table top to be a strange shape – kind of the shape of a wingnut (does that say anything about me, in a Freudian way?). That way the vat can go in the center, and I can work on two posts of sheets at the same time. Table ergonomics – who knew!

Here is what things look like so far:

The tabletop, in all it’s odd-shaped glory

the unfinished tabletop

Check out the slightly OCD use of wood scraps! I think some of these are older than me.

woodsrcap mosaic

And, after many sticky adventures in the lino glue department, I got this.

linoleum tabletop

I got a remnant piece of linoleum for five bucks (sweet deal!) and pretty much winged it to get it properly glued down. I’ve laid tile before, but tiles are not three feet long and intent on curling into the glue. It was an evening filled with muttered curses, sticky fingers, and an eventual acceptance that glue smears are a fact of life.

And see those strips of wood at the top of the photo? Those are destined to be the water-catching lip. When I finally get done varnishing them, anyway.

Categories: DIY, papermaking, update | Tags: , , , , | Leave a comment

The pressure is mounting

Originally published Apr. 30, 2012

But only because the press is now functioning! I think we called this thing the Armadillo when I was at Carleton, which doesn’t make a whole lot of sense since it has a plastic anteater on it. Then again, the fact that it has an anteater on it doesn’t really make sense, either, so let’s just go with it and dub it The Armadillo.

a hydraulic press

Isn’t it pretty? And look at what it’s sitting on – table no. 1!

The Armadillo’s job is to squeeze most of the water out of newly formed paper, so that it can dry faster (in theory – more on that later). It also helps with paper strength and texture. And it can do a really cool embossing trick if I put something textured in there with the paper.

Stay tuned for more progress reports – things are suddenly moving forward at a ferocious pace!

Categories: business, papermaking, update | Tags: , , , , | Leave a comment

It lives!

Originally published Apr. 10, 2012

The Critter is alive again after some quick re-wiring and one very nerve-wracking flip of a switch. This is one big step closer to actual papermaking!

Categories: business, papermaking, update | Tags: , , | Leave a comment

I am the cardboard queen

Originally published Mar. 29, 2012

In preparation for actually making paper, I am making myself a drying system. It will consist of cardboard-cotton-cardboard “sandwiches,” stacked on top of one another (since I can’t afford to knock down a wall and replace it with a heated stainless steel sheet). The cardboard, being corrugated, lets air circulate, while the cotton helps wick moisture out of the new sheets of paper. In theory, anyway.

This style of dryer works best when the cardboard is double-wall corrugated, which is just a fancy way of saying it is a little cardboard sandwich, itself.  Two layers of corrugation for twice the airflow! Problem is, double-wall corrugated is not as easy to find as regular ol’ normal cardboard. But I found a place that would let me order some, and I picked it up this week on Monday.

Well. I got home, unloaded, and realized that 48″ x 36″ sheets are enormous. So what did I do? I got out my trusty box cutter, and the hugest cutting mat I could find, and went to work.

Hours later, I had cut all 44 sheets in half, declared myself queen of all things cardboard, and hauled them down to their destination: the guest bath.

stack of cardboard spanning the bathtub

Let’s just hope this thing doesn’t touch the ceiling after I add the absorbent cotton layers…

Categories: business, DIY, papermaking, update | Tags: , , , , | Leave a comment

Greeting card fever!

Originally published Mar. 27, 2012

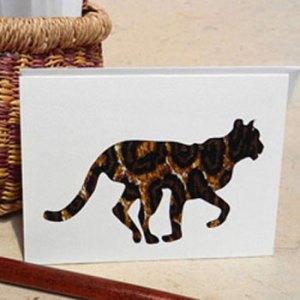
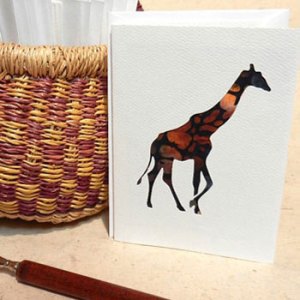
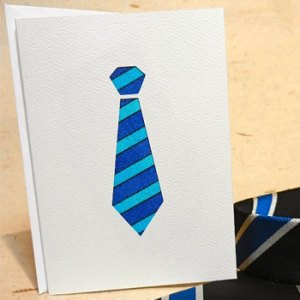
Give me a die-cutting machine and apparently I will go nuts. I adore that thing, and look at the cool cards I can make with it!

cheetah greeting card elephant greeting card giraffe greeting card green ammonite greeting card plaid shirt greeting card blue tie greeting card

Check out my Etsy store if you like these as much as I do!

Categories: business, greeting cards, papermaking, update | Tags: , , , | Leave a comment

A Tale of Two Tables, part 2

Originally published Mar. 5, 2012

I know, you’ve been waiting with bated breath to see how the other table turned out. Or perhaps not, but I’ve been eager to tell you in any case.

The first table was to support my awesome (in the old-fashioned sense of the word, the thing is rather intimidating) hydraulic press, and it will do the job beautifully. The second table is to support my lovely Hollander beater, known as The Critter. It’s from New Zealand, it’s collapsable, it’s green, and I love it. But it’s an odd shape.

I learned my lesson from the smaller table, and made an effort to keep things a bit more on the square this time around. Hooray for using tools in the proper manner!

So rather than putting all four legs together in a haphazard fashion, I put the two sides together first, like so:

side of table with stretchers

This is where having only two C-clamps began to cramp (or clamp?) my style. They only opened far enough to clamp a single two-by-four to the workbench, so I had to muscle a few things into place. But even so, I got two of these in short order:

table side standing up

And neither one fell over! Or wobbled! I was getting the hang of this carpentry business. Or so I thought. But I soon realized that keeping a flat piece square is much easier than keeping a boxy piece square. And it’s even harder when the thing you’re building is heavy, as my table was turning out to be. So I got distracted from taking pictures until it looked like this:

table with lower shelf and stretchers added

Oops. You’ll just have to imagine me, standing inside the thing before the shelf was added, madly tapping and rapping on the corners, desperate to get things perfectly level, perfectly square. And then I added the shelf. Now that it’s done, I wonder if thinner boards might have been better, but part of me likes the big hefty two-by-four shelving. It’s so solid.

The only part of building this table that truly annoyed me was putting the top on. One of the stretchers across the top was a bit (a teeeeeeeny bit) wonky, and stuck up above everything else by about an eighth of an inch. Argh!

putting the top on

I had to sand it down, or risk the top flexing too much and splitting. Sadly, that meant sanding it down by hand. Not so sad, though, was my clever (if I may say so) technique. I have no idea if this is something real carpenters know and do, but this is what I came up with. I had a scrap of two-by-four that was about eight inches long, so I wrapped a big piece of sandpaper around it, and stapled it in place on one of the two-inch sides of the scrap. That left me with two big level surfaces that were covered in sandpaper. Voila! No tears in my sandpaper, no splinters in my hands.

After much sanding (and a little swearing), I finally got the top on. It was even level! Mostly.

the finished table

The top is made from two shelves that were sitting in Dad’s woodscrap pile. I didn’t even have to trim them! And somehow the dark finish adds a little somethin-somethin.

But wait until you see what I did next! Coming up … adventures in varnishing.

Categories: business, DIY, papermaking, update | Tags: , , , , , | Leave a comment

Blog at WordPress.com.